Assembly
We suggest that one be very careful when inserting the DC-DC board extender cable's connector into the DC-DC board's original slot. The connector has a rib on it but there is no cut-out for the rib in the slot. Make sure the pins in the slot are lined up with the holes on the connector before pressing it down.
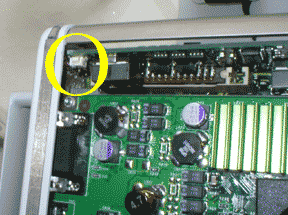
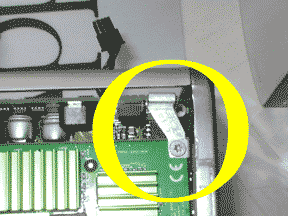
We found only two omissions in the instruction for some G4 Cubes. A G4 Cube with an upgraded CPU may have a fan in the Cube's base that is connected to the DC-DC board's end. We found that it does not have to be removed but one has to be careful to not damage the connector or pull the wires out when removing the DC-DC board. Many G4 Cubes have a brace on the other end of the DC-DC board that holds it to the graphics card post--it needs to be removed to remove the DC-DC board. The fan connector and brace on the DC-DC board are circled (yellow) in the photos below:
 |
 |
|
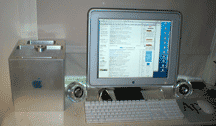 Our fully assembled and running G4 Cube in its PowerLogix PowerCube enclosure is shown at right. We added the graphite Apple logo that we removed from the original enclosure before we refinished it in black. We think PowerCube looks really cool in aluminum. Glossy white would also look great with the white Apple Bluetooth keyboard and mouse. Glossy black would look good with the original black Apple USB Pro keyboard and optical mouse.
Saw something? Send a tip or a correction
The archive ran on reader tips. What did you see, where, and do you want the credit? Something wrong on this page? Say so and it gets fixed.