Review of iPresenter, an iMac external video adapter

Hands-On Review: iPresenter, an iMac External Video Adapter
By Bill Fox
August 16, 1999
PowerR, Inc. Price: $99 list directly from PowerR
Pros: Works as advertised except for 1024x768 resolution, easy to install, relatively inexpensive.
Cons: One of three iMac resolutions did not simulscan, external case doesn't match iMac
Rating: Excellent, 4 out of 5 Exclamation Points: 
| Give me an iMac, hook up my 21" monitor and that's all the computing equipment that I need! Luckily, it's PowerR, Inc. to the rescue with the iPresenter, an iMac external video adapter.
I originally got an iMac, a Rev.A, for the office because for just over $1,000 the iMac does virtually everything in that setting for which I need a computer and it does it quickly and easily thanks to the PowerPC G3 CPU and the Mac OS. My only reservation was monitor size. The iMac's is a gorgeous 15-incher but I had gotten used to 17-21" monitors, the latter for editing reports and articles for publication and to prepare PowerPoint presentations. This led me to get an iPort from Griffin Technology (reviewed here). The iPort provided video out for my 21" monitor and an Apple serial port to boot. The iPort worked great until I replaced my Rev.A iMac (it went to our IT department to monitor our network) with a faster iMac 333 (Rev.D). Unfortunately, Apple closed the access slot used by the iPort starting with the Rev.C iMacs (yums). Fortunately, PowerR, Inc. of Seattle filled that void with the iPresenter. The iPresenter provides video out for an external monitor or digital projector. I got one for my blueberry iMac 333.
|
|||||||||||
| What You Get
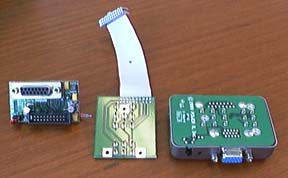
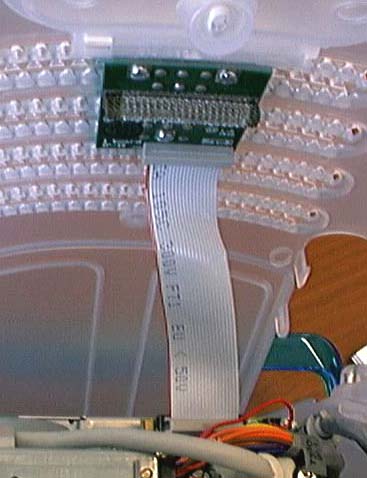
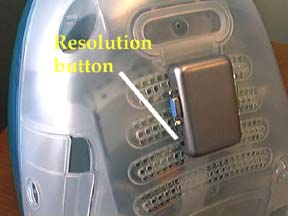
The iPresenter (Figure 1) consists of three circuit boards and a ribbon cable. Also included is a 9-page 4"x4" manual. The first circuit board (on the left) fits inside the iMac between its video cable and video port. Boards two (middle) and three (right) fit together like a sandwich, #2 on the inside and #3 outside and the iMac's case in the middle. Pins from #2 pass through the iMac's air holes making the connection with #3 and three screws hold them together. The ribbon cable connects the sandwich to board #1. Board #3 has two video ports, a VGA shown in Fig. 1 (blue) and a Mac port on the other side so regardless of which type of monitor that you have no adapter is needed. To the left of the blue VGA port is a black button. The button is used to enable more resolutions than the three that the iMac is programmed for. The three iMac resolutions and refresh rates are:
The full set of resolutions that iPresenter provides with my RasterOps 21" monitor is shown in Table 1. At 640x480 and 800x600 the image is shown on both monitors. Note, however, that the 1024x768 resolution is at 85 Hz so the iMac is blank at that resolution as well. The manual has a page of operating instructions and seven pages of installation instructions. The iPresenter has a 2-year warranty. |
|||||||||||
 |
|||||||||||
| Figure 1. The iPresenter's three boards | |||||||||||
Table 1. iPresenter resolutions with a RasterOps MC 21 21" monitor.
|
|||||||||||
| Installation
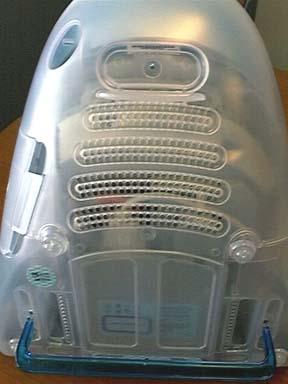
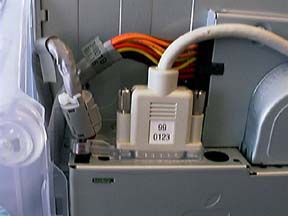
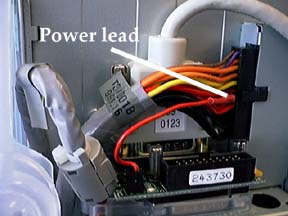
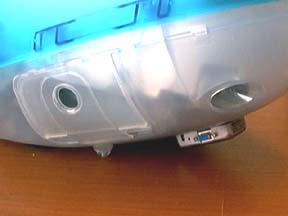
The manual says that it takes about 15 minutes to install. It took me a little less than that but I have opened iMacs and installed RAM and devices before. There are only four minor tricky parts to the installation. First, the iMac is turned on its face and the bottom part of the case (Fig.2) is removed by removing the screw in the center of the handle, grasping the handle and pulling the shell off. This exposes the iMac's internal cables (Fig. 3). The cables in the Rev.D iMac are a little different from those in the Rev. A (see Fig. in the iPort review). The standard video cable is removed and Board #1 is pressed into its place. The first tricky maneuver is to get the edge of Board #1 under the gray fitting on the leftmost gray wire harness shown in Fig 4. Once Board #1 is in place, then the iMac's video cable is plugged into the connector behind the colored wires instead of in front of them and screwed back down. Then comes the second tricky part. The red wire on Board #1 (labeled "power lead") is plugged in alongside the wire (in this case also red) that is in the sixth outer hole from the bottom of the iMac's power harness. I found this relatively difficult to do and had to use a pair of needlenose pliers to push it all the way in so the blade on the red wire was not exposed. Boards #2 and #3 sandwich the iMac's case. The third tricky part is to get all of the pins to line up and then press the two boards together so they hold. The three screws have to be tightened a bit more than I was comfortable with to get the pins to seat well enough to pass the video signal. My first attempt had to be repeated after I got a bad signal. My advice is to try the video before closing up. Finally, as shown in Fig. 5, the ribbon cable connects Board #1 and Board #2. The final tricky part is to get the case bottom in position to close, connect the ribbon cable and then to close the case without accidentally dislodging the ribbon cable at Board #1 which happened to me the first time. If you test the iPresenter before closing and it works but not after closing then you probably dislodged the ribbon cable while fitting the case bottom back on. The four tricky parts of the installation shouldn't be a problem now that you know about them. The installed iPresenter is shown in Fig. 7. |
 |
||||||||||
 |
|||||||||||
| Figure 2. The iMac's case bottom | Figure 3. The iMac's cables | ||||||||||
 |
|||||||||||
| Figure 4. Board #1 installed | |||||||||||
 |
 |
||||||||||
| Figure 5. Board #2 with ribbon cable attached to Board #1 | Figure 6. Board #3 on the outside of the iMac | ||||||||||
 |
|||||||||||
| Figure 7. The iPresenter installed on the bottom of the iMac | |||||||||||
| Conclusions
The iPresenter works great and as advertised with one minor exception. For some reason when I have the iPresenter set to use all available resolutions, 1024x768 is at 85 Hz instead of 75 Hz. This causes the iMac's screen to go blank instead of mirroring the image as it does at 640x480 and 800x600 and should at 1024x768. Nevertheless, I never use 1024x768 on the iMac as I find it too small to see so the issue is really moot. The only other minor criticism is the iPresenter's external case color--why silver metal rather than translucent ice plastic? The iPresenter is rated as excellent. I believe it is the only video out device available for the Rev.C and Rev.D iMacs. At $99, the iPresenter is not cheap but it is certainly far from being exorbitant. I couldn't get along very long without it. |
|||||||||||
Copyright © 1999 by Bill Fox
All rights reserved--no use permitted without attribution.
Of course . . .
Saw something? Send a tip or a correction
The archive ran on reader tips. What did you see, where, and do you want the credit? Something wrong on this page? Say so and it gets fixed.